How to… Back to Basics
No matter how long you've been subbing - you can always learn more!
Overview
Printing and pressing your metal items well and to a high standard is key to maximising sales and growing your business. Here at Subli Metals we offer a support service for any problems or issues that you might have along with our money back guarantee. All our metal is coated with polyester which means it is suitable for sublimation. Our website has pressing information and advice and we regularly test new items and batches of metal to ensure you’re getting premium products. We’re always looking for the latest design ideas with the aim of helping you and your business.
Design work
Every item begins with design work! We have two main areas which our customers sell into, the pre-printed market and the personlised market. For the pre-printed market designs need to be generic “World’s best daddy” or “Merry Christmas” and copyright free! For the personalised market you can work more closely to give the client an individual product. You need a design programme, something like Photoshop, Affinity Designer/Affinity Photo, Corel Draw or Illustrator. Remember to always flip designs before printing so it prints the correct way. Also use our free downloadable templates for anything that is not a standard shape so your designs fit exactly.
Printing Tips
We get asked for printing tips all the time! We’re always here to support you if you’re having any issues. There are always three key variables you need to remember which will affect your printing.
- Print Your Design Firstly you need to create and print your design – making sure you have flipped it ready for printing. Make sure to use a template or ensure you leave a 2mm bleed around your design.
- Press Your Item While your press is heating up stick your metal to the design using heat proof tape along one long edge. Make sure you peel the protective film off the metal.
- Check Your Design Once your design has been pressed use the sellotape hinge to immediately check your design has sublimated correctly. If any areas are faint, then repress straight away – place the item in the press at a different angle and reheat for 10-20 secs.
Troubleshooting
Despite the best intentions there are always some problems when printing and pressing.
Patchy Black Large areas of dark colours, particularly black causes frequent problems. Usually solved by doing a nozzle and or head check and clean on the printer, or ensuring more drying time between printing or pressing.
Fading / Blurring We get this a lot – when people have forgotten to remove the protective film before printing.
Design not Perfect There are three variables with pressing metal, time, temperature and pressure. If you’re having trouble our first options would be to alter these for different results. Metal is so conductive it only needs light to medium pressure.
Blotchy areas This tends to be when people have put the metal underneath on the press instead of paper on the bottom and metal on top. This second way gives the gas a chance to escape resulting in fewer blemishes. Heat set too high also causes metal to look patchy, as if the gloss has worn off in places – Remember metal sublimates at around 15 degrees C lower than most other substrates.
Printing bigger than your press
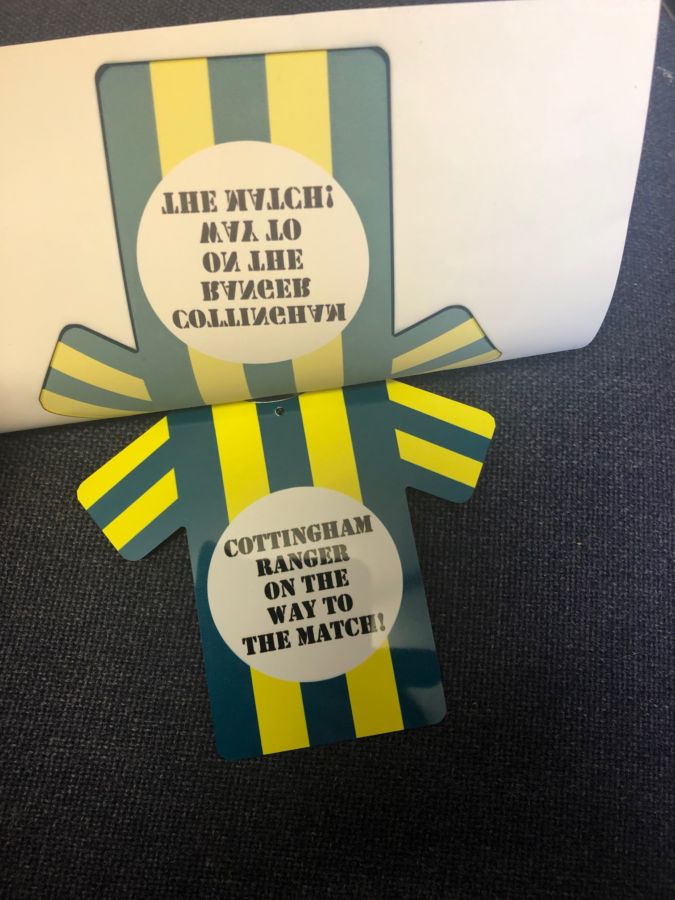
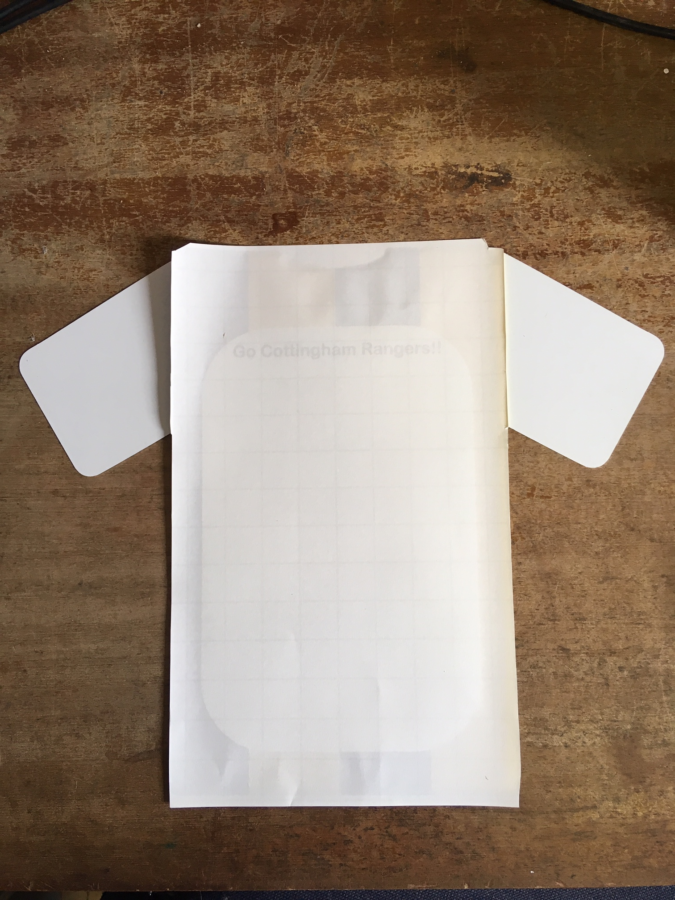
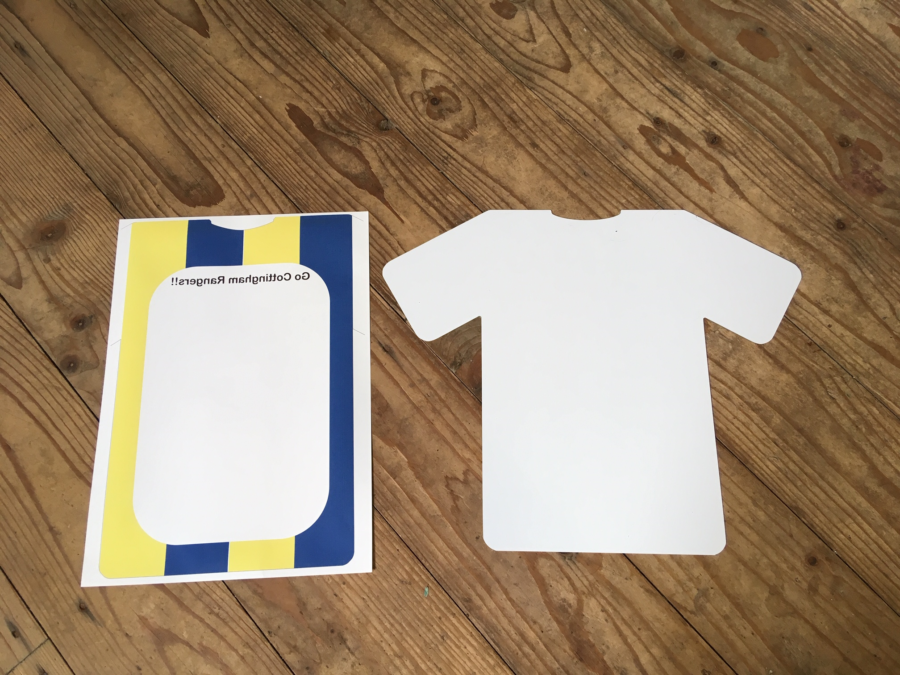
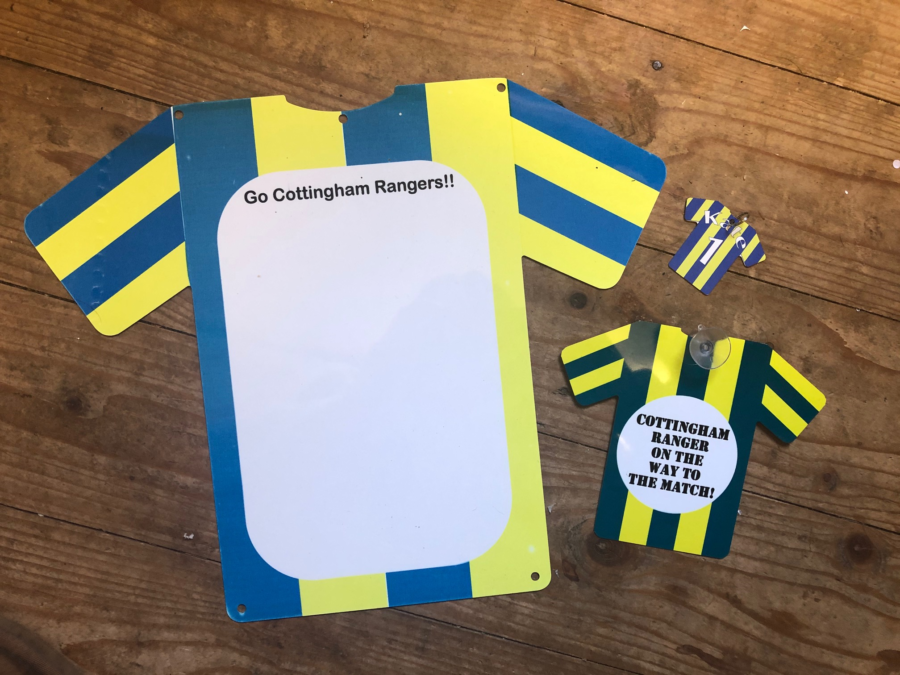
Most people only have an A4 press and often shy away from buying anything larger as they don’t think they can press it. However this isn’t the case! We’re always printing larger items here at Subli Metals on our A4 press. The key is to do it in sections and avoid overlapping. We’ve shown the process here with our new A3 t-shirt shape which we’ve redesigned exactly for this purpose. The top and bottom of the sleeves now line up so you can print it in three sections
- Print out the central section of your design on a piece of A4. Don’t forget to flip any writing.
- Line it up with the central section of the t-shirt. Trim any edges which don’t line up.
- Press the central section and remove the paper. Using the template (provided) take the two sleeves into a sheet of A4 and print them. Cut them up and stick to the sleeves of the t-shirt and press – either at once or one at a time.
- Remove the paper and you have your A3 item printed on an A4 printer and press!! You can also just print a smaller section leaving white space around, or trim/tear designs to print the edges of a larger item piece by piece.
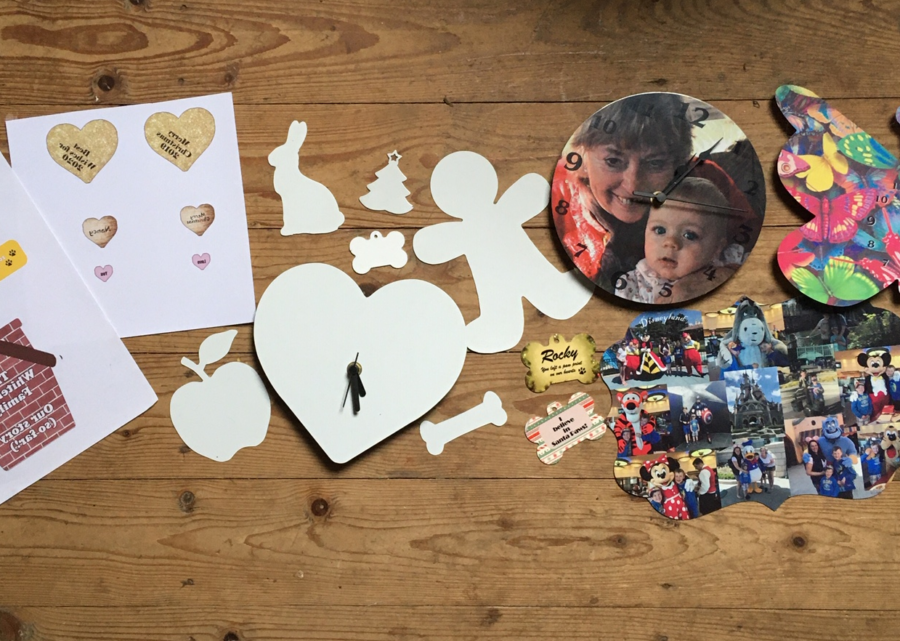
For this project we featured: